Pages

Sunday 28 December 2014

Christmas recap


Hi Everybody!

I hope y'all had a holly jolly christmas with your friends and family.

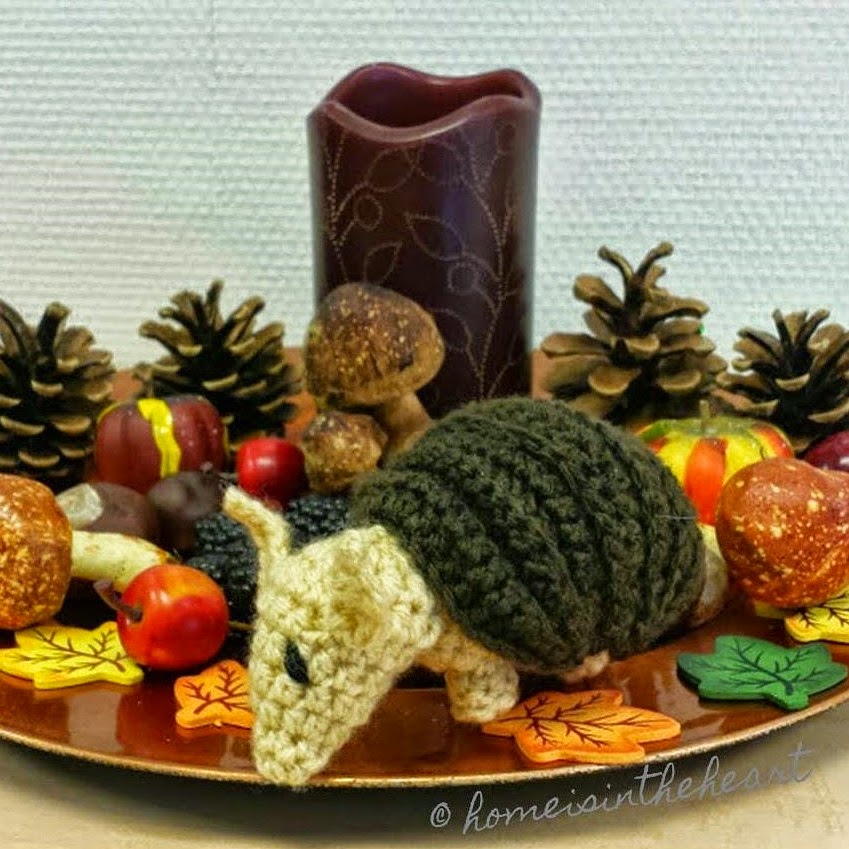
Here's a small selection of the things that I've completed the last few days and weeks.

These 3 snowmen were presents for my mum, godmother and SIL. I made them out of clay pots, styrophor balls, paint, wooden beads and a small amount of ribbon. The eyes were out of wacky eyes but they could also be painted like the mouth.

Probably you know this one from the Dreamworks movies "How to Train Your Dragon". Yes, it's he himself: Toothless the Dragon. I made him for a friend, who had his birthday a few days before christmas. He absolutly loves dragons in all versions.
And this nice guy was finished at the last minute of christmas 2014. I found the pattern on december 25th and immediately decided to crochet him. He was finished at December 26th in the late evening.

Incidentally, I've knitted several pairs of socks and crafted some other odds and ends (which I haven't photographed) for christmas.

Thank you for stopping by


Sunday 14 December 2014

A VW-Bulli for Mr. Heart

Hi Y'all!

A few weeks ago I saw this pattern over at Ravelry. Because I know that Mr. Heart loves the van's from VW I asked if I should do one for him. Of course he liked it and wanted to have one. So I sharpened my crochet hook and started the project. Here's what came out.
Credit: The pattern is made by Ester from https://epsiej.wordpress.com

Hope you'll have a calm third advent.


Thank you for stopping by.

Monday 8 December 2014

Homemade hot chocolate mix

Hi Y'all!

This year I had a special surprise for my colleagues and dear friends on St. Nicholas. Once again I was inspired by Pinterest. 

I made a Hot Chocolate Mix on my own. I filled it into jars and attached how-to-do's and small fake-fir branch.
Because I have a little more colleagues, I have made a "few" of these little presents.

I think they liked it. Hope you had a happy St. Nicholas-Day (if you know this tradition) and a nice 2nd Advent.
         

Sunday 30 November 2014

Advents box

Hi Y'all!

Today is the 1st advent and we celebrate this day, as usual, with lighting the first candle of the avents wreath. But we don't have a usual advents wreath because I never was a fan of usual advents wreaths. My "wreaths" have always been a little bit different. 

Here's the advents "wreath" of this year:
It's made from an old toolbox, that I found in the barn last year. I thought it was too good to throw it away but at the first moment I had no idea what to do with it. So I put it in my crafting stock.
Gradually grew the idea to refashion the toolbox for decorating. So I removed the handle and gave a darker stain to it. Then I put in some floral foam to set the fir branches and a few ornaments. The sorting fields were perfect to hold the candles.
I hope you also had a nice 1st advent.


Tuesday 25 November 2014

Candied almonds with a little difference


Hi Y'all!


Today it was that time again to candy almonds, like I do every year in the christmas season. As I did last year and the year before and the year before and so on. But this year I tried something new. I tried spicy almonds. I put on a bit of pumpkin pie spice and it turned out great. It's something new for me but I like it and I think I will do this again.


BTW: Yesterday, my little blog turned 1 year (yeah, happy birthday!) and I am glad that I still here to share what I do. Do you remember my first post of all? It was Wooden Snowmen welcomeAlthough I try to publish articles regularly, unfortunately it's not always possible. I hope y'all still enjoy my little blog-land and maybe my readership will growing even a little. Whatever, for me only remains to say: 

Thank you for reading my blog!


Thursday 20 November 2014

Elf on the shelf

Hi Y'all

today I finished the first christmas-crocheting for this year. I like the tradition of the elf on the shelf. So I wanted to have an elf of my own. Of course I don't want a bought one but a homemade one. I searched a lot in the internet but I couldn't find a pattern I liked. So I wrote my own and here is the result:


I am so excited to see where I'll find him everywhere.

Hope to see you soon


Tuesday 18 November 2014

Crafting for Charity

Hi my friends,

lately it was a bit quiet here in my blog. But there was a very good reason. 

A few weeks ago my dear colleague shared a publication on facebook that the Katzennothilfe Hess. Lichtenau was searching for wool and wool scraps. 

Because our beloved Salem comes from there, I asked what the wool is for. The answer was very easy: They wanted to knit and crochet socks, hats and scarfs and sell them on ebay to get some money for the cats.

Immediately it was clear that I would like to help, because I always craft  with wool most of the time. So I talked to one of the involved persons and asked if they like to have the wool or if I rather should contribute finished products. She told me that, at the moment, there was only her mother knitting socks for this campaign and if I like, they would be very happy about finished products that can be sold directly. So here are the finished products for selling on ebay. 


Hope and keep fingers crossed that much money can be collected.

So you can see, why I was not that active on my blog, the last time. But because I can't, do crochet and knit all the time of course, I did some small projects without wool, in between. Hope to show you soon.

Until then

Friday 24 October 2014

Canning, decorating, transforming and crocheting

Hi Everybody!

I had this week off and it was very relaxing, but also very busy. I had planned many fun things and ultimately all done. Finally I had enough time, to do all the things I wanna do. So here is a little summary of the things that I've done this week.

Autumn is canning time and therefore of course I also canned some things.

First I tried canning pumpkin puree because many recipes for e.g. pumpkin pie or pumpkin bread, requires pumpkin puree and you can't have canned pumpkin in Germany. At least I could not find one until now. So I made my own. I had 3 kinds of squash: Hubbard, Spaghetti and Pumpkin. Now I'm prepared for everything with pumpkin.
Second was trying a new jam. I had heard about zuccini-jam years ago and since that time I wanted to try it. So now was the time. I made a zuccini-apple-jam and what should I say except yummy?

If I did not  canned, I have done other things. Like to decorate the front door for Halloween,
transform an old suitcase to a cat bed
and I crocheted a lot. Here are the results:
Credit for the ladybug: The pattern is created by craftyshanna. You can find it on Ravelry.
Credit for the plane: The pattern is created by Angela Van Camp. You can find it also on Ravelry.

These three are my favorits:
The Unicorns were based on the pattern of Rachel Hoe. I have modified it according to my wishes. You can find the original pattern on Ravelry.

So you see, I had a lot of fun this week. Hope you had a fun week too.


Tuesday 21 October 2014

From an old suitcase to a new cat-bed - easy transform

Hello y'all!

A few weeks ago Mr. Heart and I went on a flea market because it was a beautiful sunny autumn day and we both love to stroll through the flea market to see all the funny and weird things that people sell and buy there.

At one stall we saw a few old suitcases and I had the idea to switch one of them to a cat-bed. So we haggled with the seller and got the case for only 5 €. 


When we got home I gave the suitcase a large portion of febreze and an anti-vermin, because of its age, of course it smelled pretty musty and I didn't know what exactly lived in it. Then I let it open for the next two weeks.

Now I decided that the smell is much more better and I could start the cat-bed-project. I began with the lid. I glued a piece of fabric, which I had left over, with spray glue into the lid of the case. In addition, I fixed the fabric with staples. Because the spray glue doesn't take very long to dry, so I could directly start with the next step. 

Years ago I designed these egyptian stencils from cardboard. 


Former I used them to do a border on the wallpaper. Today they came back into use. I lay down the stencils and stipped with a paintbrush golden signs onto the fabric. I used VBS hobby color gold.

While the paint was drying I had time to sew the pillow. I used an old pillowcase and filled it with fiberfill. Meanwhile, the color was dry and I could put the pillow directly into the suitcase.

The whole project was done in less then two hours (Ok, 2 weeks and two hours). Now it's on the cats to love it or not. To help their decision, I put on a little bit of catnip onto the pillow. ;-)

Thanks for dropping in


Tuesday 14 October 2014

Kurt the armadillo

Hi!

This is a part of my fall decoration at work. Some pine cones, some little pumpkins, a few chestnuts and other little ornaments. And of course a fake candle because we aren't allowed to have real candles at the office. But wait, there's something that doesn't belong there. 

But Stop! What's this in the middle? 

Oh yes, it's a small armadillo that has been hiding there. Very cute and very decorative.

Hope to see you soon.

credit: The pattern's from Kati Galusz. You can find it at ravelry.

Sunday 12 October 2014

Old friends, new friends

Hi Y'all!

Hope you've had a nice weekend. Today I want you to meet some old and a new friend. First the old friends: You maybe remeber a post back in June when I told you that I had a visit from Sam Hain. He was a little early and promised to be back when the time is right. Now he has kept his promise. He's back. And he brought a few friends like the little turkey, you might remember from a post back in September. And one new friend: The little scarecrow. 
Together they will help to decorate our living room looks like fall.

Thank you for stopping by and enjoy the last days of golden autumn.


Tuesday 23 September 2014

Happy Fall Y'all!


Just hopped in, to say: It's offical fall now! 
It is my favorite season because of the colors. Here's the another part of my falldecoration.

Thank you for dropping in


Thursday 18 September 2014

3D autumn wall art

Hi Y'all!

The last few days I've spent my time to transform a simple black frame into an awesome 3D autumn wall art.

The other day I bought this picture frame because I thought there are 6 individual frames, but when I opened the package I found that there is only one frame. So I set it aside, waiting for a genius idea. 

Last week I've got the idea that I wanted to do a special decoration for fall. 

So I painted the frame with this metallic color from VBS. The shade is copper. I havn't done very neatly, so the black of the original frame still shines through and I have a vintage effect.

Then I covered the rear wall with different materials like scrapbookpaper and different fabrics. I glued on, some leftover deco pieces from the last years. One frame is filled with fabric and then stamped on some apples.
The stamp is self made from an old rubber. (The idea I often saw over at pinterest.) The textile color is from VBS.
One frame I totally filled with autumn leaves.
This artwork includes the colors and some things I love about autumn. Hope you'll like it too.

Till next time


Monday 15 September 2014

Gobble gobble

Hi Everybody,

hope y'all had a nice weekend and enjoyed the last days of summer. Since Thanksgiving is not too far away, I thought it might be a good idea to prepare the turkey right in time.


Hope to see ya next time

Wednesday 10 September 2014

Back-to-Work-Pie

Hi ya!

Everybody is talking about Back-to-School after the summer, but what's about Back-to-Work after the summer-vacation?

In our department, it's common to spend cake if you go on summer-holidays, but I decided I want to bring some cake, when I return from my summer vacation back to work. I brought an apple-pumpkin-pie to my colleagues because I had these wonderful pumpkins from my own garden. Some of my colleagues liked it and some... ok well.


If you like it not too sweet and you like to bake at it, here's the receipe:

Preheat oven to 180 degrees C.

Pie Crust:
2 1/2 cup  all-purpose flour
                salt
1-2 tbs     cold water
1              egg
2/3 cup    soft butter

(Makes enough dough for one 30 cm baking tin)

Combine the flour, salt, water, the egg and butter in a large bowl. If the dough is too dry add more cold water. Transfer the dough to a work surface, pat into a ball and flatten into a disk. (Although many dough recipes call for chilling the dough at this point, this dough should be rolled out immediately for the best results.) Lightly flour the work surface, then flatten the disk until nearly large enough for your baking tin. Put the flattend disk into your baking tin. and press with hand until it covers the form totally. You need an about 3 cm high rim. Now the dough could chill in the fridge until next step is ready to go.

Applefilling:
3            apples, peeled, cored and cubed
3 tbs      butter
1/2 cup  brown sugar
1/2 tsp   ground cinnamon

In a pan, heat the apples, butter, brown sugar and cinnamon until the apples are tender and light golden brown. Put the apples on the pie crust.

Pumpkin-filling:
400 g     pumpkin puree (canned or fresh)
3            eggs
300 g     cream
1/3 cup  brown sugar
1/4 cup  maple syrup
2 tsp      pumpkin pie spice

In a large bowl, combine pumpkin puree, eggs, cream, brown sugar, maple syrup and pumpkin pie spice. Mix well, and pour onto the apples. Place pie on a baking sheet, and bake 20 minutes.

While pie is baking, make crumb topping:
1/2     cup all-purpose flour
1/2     cup brown sugar
6 tbs  cold butter
1 tbs  grated ginger (optional)

Combine flour, sugar, butter and ginger until they're nice crumbly.

Remove pie from the oven. Sprinkle crumb topping over pie. Then put it back to oven and bake another 30-40 minutes, until crust and crumb topping are golden brown.

I know it's hard, but please wait to enjoy until it's completly cool.

This was the second thing I made out of my pumpkins. If there are any questions about the receipe, please let me know.

Thank ya for visiting my little blog